Topics Map > Assessment Tab
KB User's Guide - Assessment Tab - Quiz/Survey Results
Note
The Assessment Tab is not enabled in the KB Admin Tools for groups that do not have any existing quiz/survey questions. If your group would like to use the Assessment Tab features, reach out to kb-team@doit.wisc.edu to have the tab activated.
Viewing Results in the KB Admin Tools
To access the Quiz/Survey Results screen, go to the KB Admin Tools > Assessment tab > Quiz/Survey Results link.
Results for you to view will appear under these filters in table form. If you do not have any Quiz/Survey Results to view, a "No records found" message will display under the filters.
Description of Filters
-
Module - This field defaults to "All Modules". In the drop down menu, you will see the already existing Module names listed. If there are no modules in existence, "All Modules" will be the only option in the drop down menu.
-
User - This field defaults to "All Users" and display the Usernames (e.g. netID + Domain) of those who have taken the Assessment. If no users have taken a quiz or survey, "All Users" will be the only option in the drop down menu. Data in this field that begins with
anonymous_followed by a string of letters and numbers indicates that a User chose to take a survey anonymously. -
User IP - This field defaults to "blank". You may enter an IP range to search for User IPs. You may enter a full IP address or a partial address.
-
Start Date - This field defaults to the last month from today's date. You may click on the linked field name to get a pop up calendar.
-
End Date - This field defaults to today's date. You may click on the linked field name to get a pop up calendar.
-
Limit - This field defaults to a limit of 25 results per screen. You may choose from the dropdown menu anywhere from 25 to 1000 results to appear on your screen.
-
Go - After setting the filters to your specifications, clicking this button will display your results.
-
Save .CSV button- Clicking this button downloads the results on the screen onto a CSV file.
Description of the Columns in the Results Table
The image below shows all available column headers of the table populated with Assessment Results. You may check/uncheck the checkboxes to customize your display. The asterisked items indicate which fields appear by default.
-
*No. - Sequential numbering of all-user attempts.
-
*Module - Displays the Module name in its entirety. This field is sortable.
-
*User - Displays the NetID, an @ sign and the Domain name. This field is sortable.
-
UserIP - Displays each attempt's User IP address. This field is sortable.
-
*Timestamp - Displays the time and date on which the user took an Assessment. This field is sortable.
-
*TimeSpent - Displays time until Assessment was completed in seconds. This field is sortable.
-
*Questions - Displays total number of Questions.
-
*Correct - Displays total number of Questions that were correct.
-
*Wrong - Displays total number of Questions that were incorrect.
-
Repeat - Displays number of questions repeated (e.g. an incorrect question asked again in a subsequent attempt)
-
Raw Response - Displays user response and corresponding letter separated with pip delimitation.
-
*Score - Displays score by percentage. An "NA" will appear in this field if the Assessment taken was a survey. This field is sortable.
-
Delete? - You may delete a Result from this screen by clicking on the Delete button in this column. A popup message will appear, click on OK or Cancel.

Viewing Your Results by Module
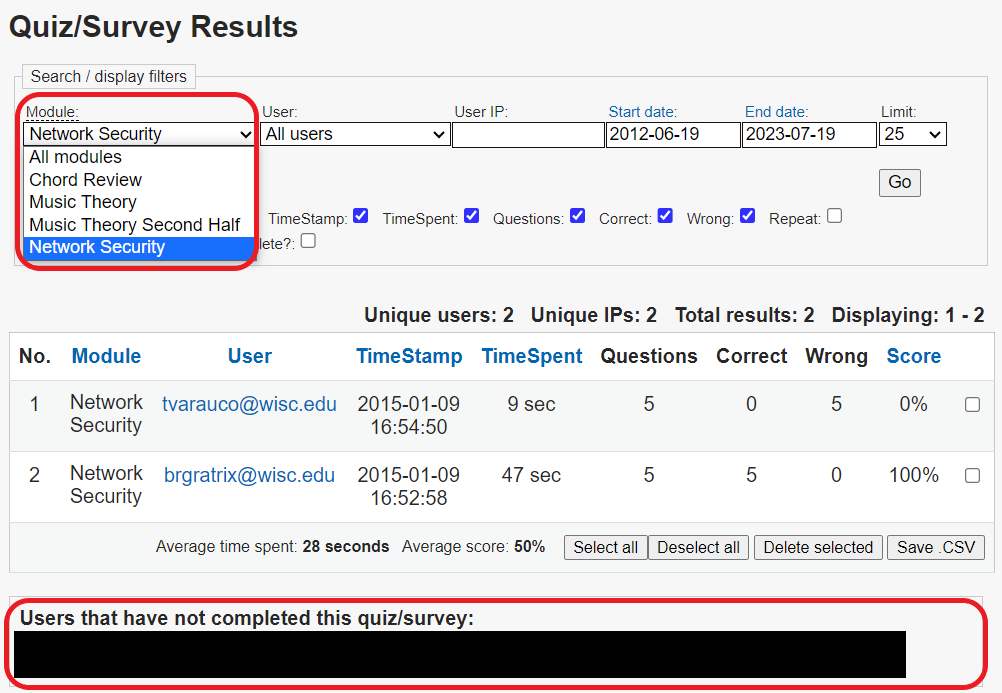
If you select a specific Module from the Module filter, the results will appear in a table below the filter.
In the image below, we have selected the Network Security Module from our test KB site.
As we mentioned in the section above, you will be presented with a nine column table to which you may add/ remove columns by checking/unchecking the check boxes.
Below the table of results, you will see a very list of your internal users who have not completed the quiz/survey. These results will appear in lighter color font and is semi-colon delimited by name and email address. This list is intended to be formatted in such a way that you can easily copy and paste it into the To: field of an email message so you can contact those individuals to request that they take the quiz/ survey.
Under that list, you will a table called Frequency Tally for: XXXXX (e.g. name of quiz/ survey) with a list of helpful information such as:
- No. - Numbering of all questions in the Module.
- The Question ID number and Question - Displays the Question ID number and the Question in its entirety. The image above shows a question from our test KB site. The number that is circled in the Question ID number.
- Count - Displays the number of times a Choice was selected.
- Percent - Displays the percentage of each Choice.
- Save .CSV button - You may save this data as a CSV file
Viewing Assessments in your Live Internal KB Site
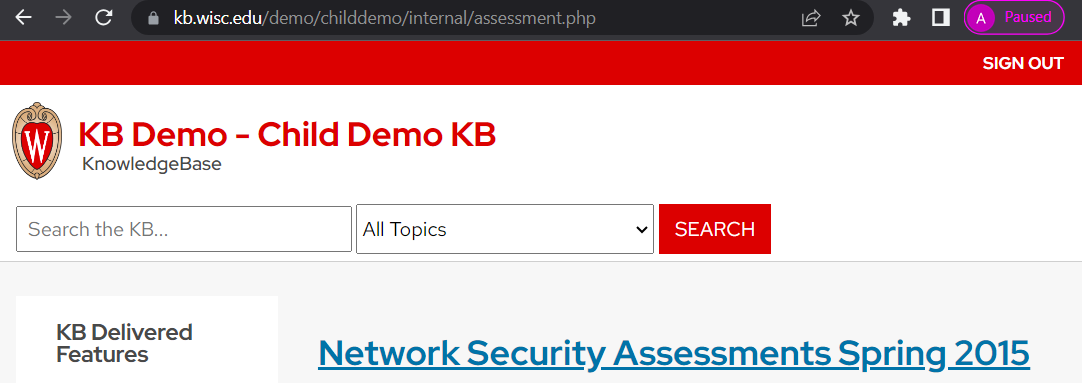
To access your site's Assessments, append: assessment.php to your internal site URL; for example:
https://kb.wisc.edu/YOURKBGROUPNAME/internal/assessment.php.
This will lead you to a page with the default page heading of: your KB Site Name and the word, "Assessment".
In the image below from our Test KB, you will see the timely page heading created for this page, "Network Security Assessments Spring 2015". For more information on how to create and modify the page heading, please see KB User's Guide - Assessment Tab - Quiz/Survey Settings.
Available Modules
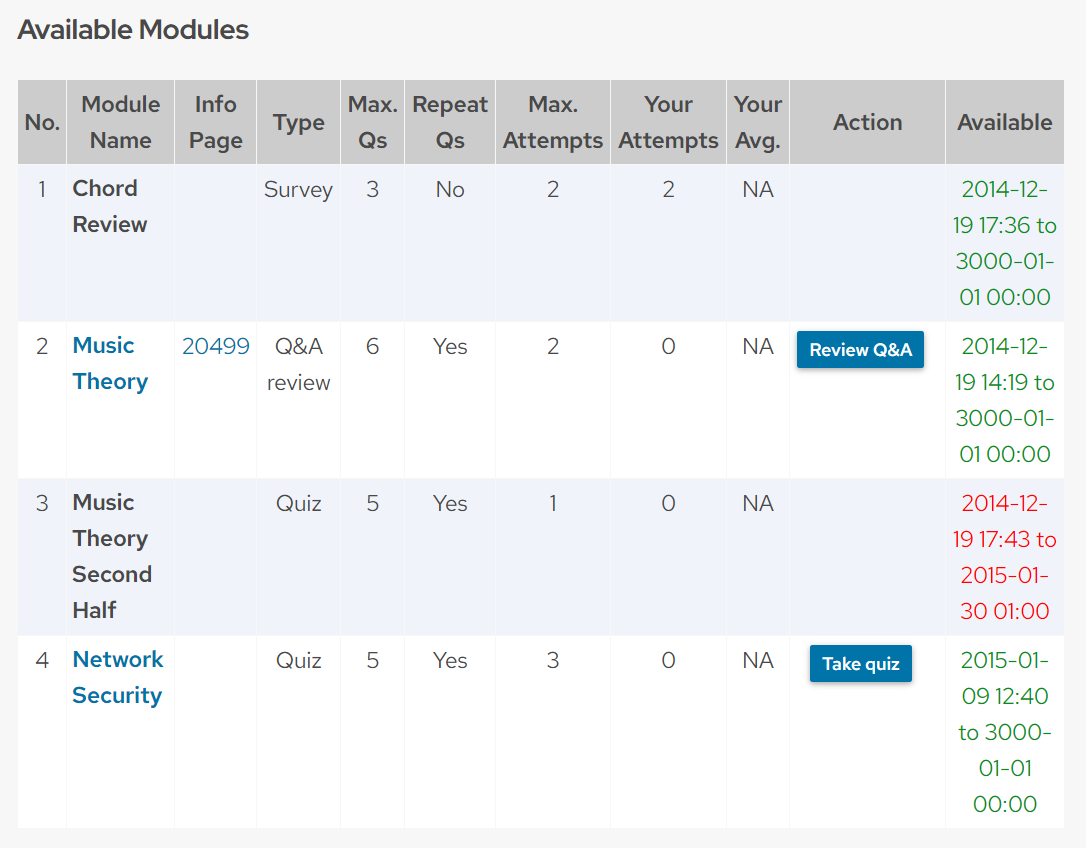
From this page the user will be able to see a table of Modules available to them.
In the example from our test KB site below, 3 quizzes and a Q&A Review are available to this user.
Your Results
From this part of the page, the user will be able to see her/his results.
In the example below, you can see the results for a quiz taken twice.


